For informational purposes only. Not a substitute for veterinary advice. Consult your veterinarian for specific medical decisions.
Follow product labels; observe the animal closely, and seek qualified veterinary help when signs persist or worsen.
A proper corn snake enclosure setup is the foundation of your pet’s health and longevity. Corn snakes (Pantherophis guttatus) are one of the most beginner-friendly reptiles, but their reputation as “easy keepers” doesn’t mean you can cut corners on habitat design. A well-planned enclosure provides a temperature gradient, secure hiding spots, and the right substrate for natural burrowing behavior. This guide walks you through five clear steps to build a habitat your corn snake will thrive in — whether you’re starting with a hatchling or upgrading to an adult enclosure. For a full species overview, see our corn snake care guide.
What You Need Before You Start
Before building your corn snake enclosure, gather five core components: a glass terrarium sized to your snake’s life stage, an under-tank heat pad with a thermostat for controlled warmth, aspen bedding for burrowing, at least two hides plus a water bowl, and a thermometer-hygrometer to monitor conditions. This guide covers a complete setup for a juvenile corn snake in a 20-gallon glass terrarium — the most common starting point for new keepers. Adult corn snakes will eventually need a 40-gallon breeder or 4×2×2 PVC enclosure.
Want to estimate your total cost before buying? Use our setup cost calculator to budget for any reptile species. You can also compare tank dimensions with our tank size calculator to find the right footprint for your space.
Step 1: Choose the Right Enclosure Size
Choosing the correct enclosure size matters more than any other setup decision. Too small, and your snake has no room to stretch or thermoregulate. Too large for a hatchling, and the snake may feel exposed and refuse to eat.
Corn snakes grow steadily from 10-inch hatchlings to 4-to-5-foot adults, and their enclosure must scale accordingly:
| Life Stage | Snake Length | Minimum Size | Dimensions |
|---|---|---|---|
| Hatchling | Up to 20” | 10 gallon or tub | 20” × 10” × 12” |
| Juvenile | 20–36” | 20 gallon long | 30” × 12” × 12” |
| Adult | 36–72” | 40 gallon breeder | 36” × 18” × 16” |
A reliable rule of thumb: the combined length and width of the enclosure floor should equal or exceed the snake’s full body length. For a 4-foot adult, a 4×2×2 PVC enclosure (48” + 24” = 72”) easily meets this standard.
For this guide, we use the REPTI ZOO 20-Gallon Glass Terrarium — a front-opening terrarium measuring 30” × 12” × 12”. Front-opening doors make feeding and cleaning significantly easier than top-access tanks, and the screen top provides ventilation while supporting heat mat and UVB mounting. Glass terrariums also let you observe your snake from all angles. For a deeper comparison of enclosure types including PVC and melamine, see our guide on how to choose a terrarium.
Step 2: Install the Heating System
Corn snakes require a temperature gradient to thermoregulate — moving between warm and cool zones to control their body temperature. The warm side should reach 85°F (29°C), while the cool side stays around 75°F (24°C). Ambient temperature in the middle should hover near 80°F.
The most reliable way to create this gradient is with an under-tank heater (UTH) placed beneath one-third of the enclosure floor on the warm side. The BN-LINK Heat Pad 6”×8” 8W is appropriately sized for a 10–20 gallon tank, waterproof, and UL-listed for safety.
A thermostat is non-negotiable. Without one, an under-tank heater can exceed 110°F at the glass surface — hot enough to cause severe thermal burns to your snake’s belly. The BN-LINK Thermostat Temperature Controller costs under $20, handles up to 1000W, and is ETL-listed. Here’s how to set it up:
- Mount the heat pad on the exterior bottom of the terrarium on the warm side, covering roughly one-third of the floor area. Press it flat against the glass — air gaps cause uneven heating and hot spots.
- Plug the heat pad into the thermostat, then plug the thermostat into your wall outlet.
- Set the thermostat to 85°F — the target warm-side floor temperature.
- Place the thermostat probe on the terrarium floor directly above the heat mat, sandwiched between the glass and the substrate. This reads the actual surface temperature your snake comes in contact with.
Never rely on the heat pad’s adhesive backing alone. Always confirm the real surface temperature with a thermostat probe. For more on choosing heating equipment, see our guides on how to choose a heat mat and how to choose a reptile thermostat.
Step 3: Add the Right Substrate
Substrate does more than make the enclosure look natural — it affects humidity control, burrowing behavior, and respiratory health. Aspen bedding is the gold standard for corn snakes because it’s absorbent, dust-free, and naturally encourages burrowing, which is a core instinctive behavior corn snakes exhibit in the wild.
Zoo Med Aspen Snake Bedding 3-pack of 24-Quart bags is specifically manufactured for snakes and provides enough material for multiple full substrate changes. Pour it in at a depth of 1–2 inches for juveniles and 2–3 inches for adults so your snake can tunnel and conceal itself beneath the surface.
Never use cedar or pine shavings. Both contain volatile phenols and aromatic oils that cause respiratory failure and neurological damage in reptiles. Sand and gravel can cause intestinal impaction if accidentally swallowed during feeding. For quarantine setups or hatchlings, plain paper towels are a safe temporary alternative — they make waste easy to spot and remove.
Spot-clean soiled areas daily by removing visible waste with a paper towel or scoop. Plan to replace the entire substrate layer every 4–6 weeks to prevent bacterial buildup and ammonia odors. If you notice a strong smell or visible mold, change the bedding immediately regardless of schedule. For a broader look at substrate options across species, see our substrate selection guide. When it’s time for a full deep clean, our reptile tank cleaning guide walks you through a safe step-by-step disinfection process.
Step 4: Set Up Hides, Water Bowl, and Décor
Corn snakes are secretive by nature. In the wild, they spend most of their time concealed under logs, leaf litter, and loose bark. Replicating that security in captivity is key to reducing stress and encouraging natural behavior.
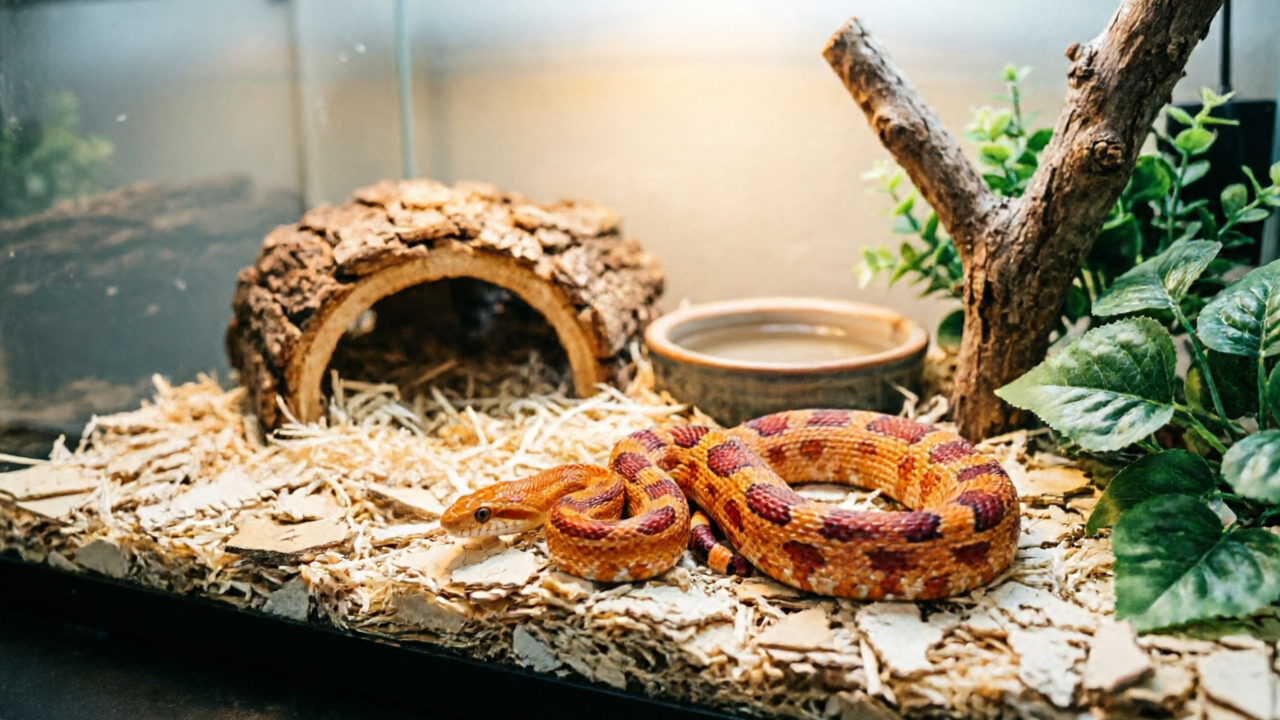
Provide at least two hides — one on the warm side and one on the cool side of the enclosure. Each hide should fit the snake snugly; the snake should barely be able to curl up inside. A hide that’s too large defeats the purpose because the snake won’t feel the walls against its body, which provides the security it needs. Cork bark flats, resin caves, and half-log hides all work well. Don’t be afraid to experiment with placement — I’ve found my corn snakes prefer tight cork bark flats over spacious resin caves every time.
Water bowl: Place a shallow, heavy ceramic water dish on the cool side. It should be large enough for the snake to soak its entire body, especially during shedding. A heavy bowl prevents tipping — corn snakes are surprisingly strong and active at night.
Enrichment: Corn snakes are semi-arboreal and benefit from climbing branches, cork tubes, and vertical décor. Add fake plants and foliage to create visual barriers and additional cover. These enrichment items reduce stress and encourage natural exploration behavior.
Optional UVB: Corn snakes can survive without UVB lighting, but providing a low-output UVB bulb (5.0 or 6% strength) on a 12-hour cycle supports natural day-night rhythms and vitamin D3 synthesis. For more on the benefits of UVB for snakes, see our UVB bulb guide and our complete lighting and heat setup guide.
Step 5: Verify Temperature and Humidity
Before introducing your corn snake to the enclosure, verify that your temperature gradient and humidity levels are correct. This is the quality-control step that prevents health problems before they start.
Place the probes of a JEDEW 2-Pack Digital Thermo-Hygrometer at both ends of the terrarium at substrate level — one on the warm side over the heat mat and one on the cool side. The 2-pack is ideal because you need simultaneous readings from both zones to confirm a proper gradient.
Temperature targets:
- Warm side floor: 85°F (29°C)
- Cool side: 75°F (24°C)
- Ambient middle: approximately 80°F
Humidity targets:
- Normal: 40–50%
- During shed: 60–70%
If the warm side runs too hot, lower the thermostat setting by 1–2 degrees and wait an hour for the glass to adjust. If humidity is too low, add a moist hide — a small container with damp sphagnum moss — on the warm side. During shedding periods, this humid microclimate helps your snake shed cleanly in one piece. Let the enclosure run for at least 24 hours before introducing your snake. This burn-in period reveals any thermostat fluctuations, heat pad hot spots, or humidity drift that need correcting. Once readings are stable across both ends for a full day, the habitat is ready. Use our temperature converter if you need to switch between Fahrenheit and Celsius.
Common Setup Mistakes to Avoid
- Skipping the thermostat. This is the most dangerous mistake in any corn snake enclosure setup. Unregulated heat pads reach dangerous surface temperatures and cause thermal burns. Always use a thermostat — no exceptions.
- Oversized enclosure for a baby. A hatchling in a 40-gallon tank feels exposed and may refuse food. Start small (10 gallon) and upgrade as the snake grows.
- Toxic substrate. Cedar and pine shavings release aromatic oils that cause respiratory failure. Use aspen, cypress mulch, or paper towels only.
- Only one hide. A single hide forces the snake to choose between security and thermoregulation. Always provide hides on both the warm and cool sides.
- Unsecured screen top. Corn snakes are notorious escape artists. Use screen lid clips or a front-opening terrarium with locking doors.
Sources
- Merck Veterinary Manual: Overview of Reptiles — type: authority; access-year: 2026